Begin
Python下有许多款不同的 Web 框架。Django是重量级选手中最有代表性的一位。许多成功的网站和APP都基于Django。
项目目录结构
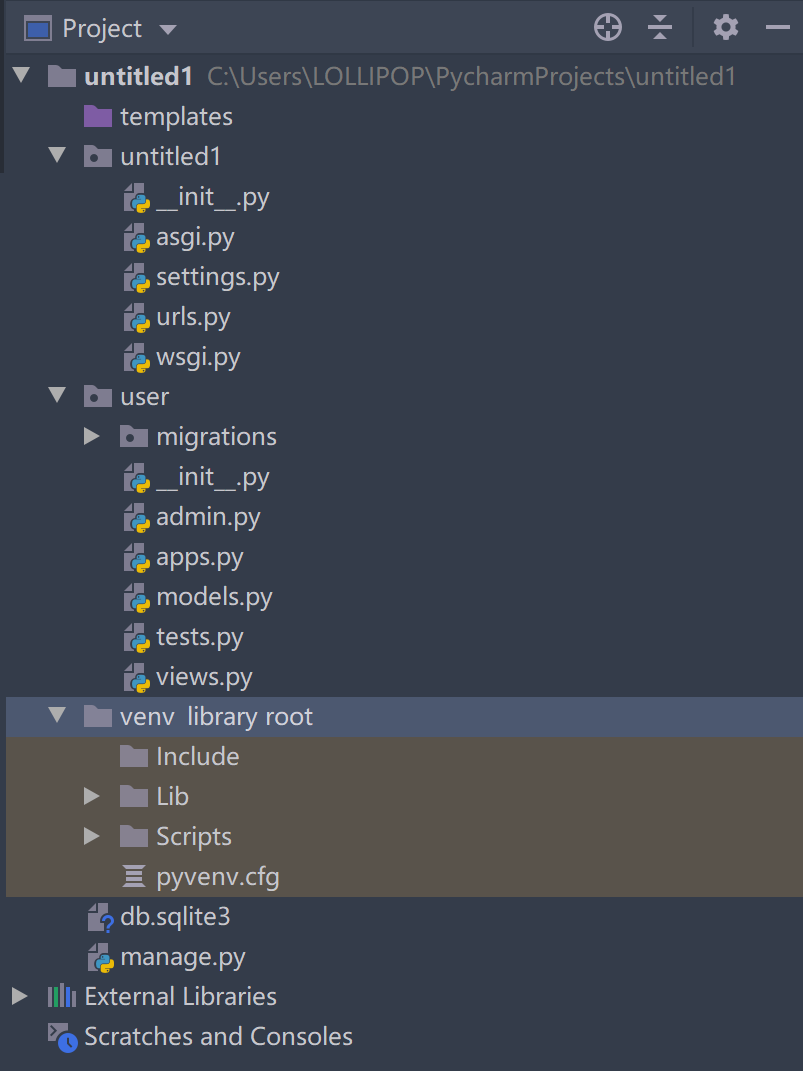
|--project

    |--__init__.py 空文件

    |--settings.py 项目的配置文件

    |--urls.py 路由定义

    |--wsgi.py 与服务器对接
本地化
settings.py内
LANGUAGE_CODE = 'en-us'


TIME_ZONE = 'UTC'
修改为:
LANGUAGE_CODE = 'zh-hans'


TIME_ZONE = 'Asia/Shanghai'
新建静态目录
网站通常需要提供类似图片,JavaScript 或 CSS 的额外文件服务。在 Django 中,我们将这些文件称为“静态文件”。Django 提供了 django.contrib.staticfiles 帮你管理它们。
添加以下配置:
STATIC_URL = '/static/'

# 新建static文件夹

STATICFILES_DIRS = os.path.join(BASE_DIR, "static")
数据库配置
DATABASES = {

    'default': {

        'ENGINE': 'django.db.backends.postgresql',

        'NAME': 'mydatabase',

        'USER': 'mydatabaseuser',

        'PASSWORD': 'mypassword',

        'HOST': '127.0.0.1',

        'PORT': '5432',

    }

}
详见:https://docs.djangoproject.com/zh-hans/3.0/ref/settings/#std:setting-DATABASES
服务启动
python manage.py runserver 0.0.0.0:8080
外部访问:ALLOWED_HOSTS = ['*']
创建APP
python manage.py startapp user
创建后项目目录会存在user文件夹
Hello world
在user/views.py内
from django.http import HttpResponse


def index(request):

    return HttpResponse('Hello World!')
在urls.py内
from user import views


urlpatterns = [

    path('admin/', admin.site.urls),

    path('', views.index),

]
在Django2.0前用url(r'正则表达式', '视图函数')
路由
在 settings.py内的 ROOT_URLCONF = 'untitled1.urls'找到 urls.py路由表
路由传参
在views内
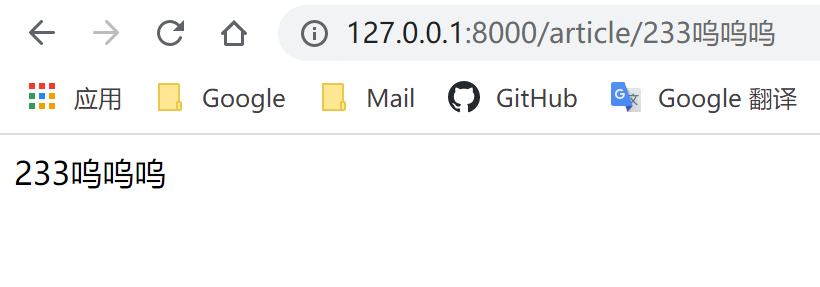
def show_article(requset, num, name):

    return HttpResponse(str(num)+name)
在urls内
path('article/<int:num><str:name>', views.show_article),
函数 path() 具有四个参数,两个必须参数:route 和 view,两个可选参数:kwargs 和 name。现在,是时候来研究这些参数的含义了。
path() 参数: route
route 是一个匹配 URL 的准则(类似正则表达式)。当 Django 响应一个请求时,它会从 urlpatterns 的第一项开始,按顺序依次匹配列表中的项,直到找到匹配的项。
这些准则不会匹配 GET 和 POST 参数或域名。例如,URLconf 在处理请求 https://www.example.com/myapp/ 时,它会尝试匹配 myapp/ 。处理请求 https://www.example.com/myapp/?page=3 时,也只会尝试匹配 myapp/。
path() 参数: view
当 Django 找到了一个匹配的准则,就会调用这个特定的视图函数,并传入一个 HttpRequest 对象作为第一个参数,被“捕获”的参数以关键字参数的形式传入。稍后,我们会给出一个例子。
path() 参数: kwargs
任意个关键字参数可以作为一个字典传递给目标视图函数。本教程中不会使用这一特性。
path() 参数: name
为你的 URL 取名能使你在 Django 的任意地方唯一地引用它,尤其是在模板中。这个有用的特性允许你只改一个文件就能全局地修改某个 URL 模式。
主子路由
- 在APP里新建
urls.py - 主路由中定义
path('user/', include('user.urls')) - 配置APP内的路由
path('login', login)
视图
视图函数格式
    def xxx(request):

        return response对象
request请求
由请求行,请求头,请求体组成
def index(request):

    print(request.path)

    print(request.method)

    print(request.is_ajax())

    print(request.scheme)

    print(request.GET)

    print(request.POST)

    print(request.FILES)

    print(request.META.get('REMOTE_ADDR'))

    # 运行结果

    # /

    # GET

    # False

    # http

    # < QueryDict: {} >

    # < QueryDict: {} >

    # < MultiValueDict: {} >

    # 127.0.0.1

    return HttpResponse('Hello World!')
response响应
由响应行,响应头,响应体组成
reder函数
通过模板引擎Django加载模板,将模板加载完成后转成 str类,再将 str给 HttpResponse并返回 response对象。
redirect + reverse函数
先reverse反转,再由redirect进行重定向
- 在主路由上添加namespace。并在每个urls.py中添加
app_name。 - 在子路由的urlpatterns每一个路由上定义name
reverse('namespace:name')
模板
注释
{# #}
向模板传参
在views.py内
def test(request):

    name = 'admin'

    day = datetime.now()

    return render(request, 'index.html', context={'name': name, 'day': day})
模板内
<body>

用户:{{ name }}

当前时间:{{ day }}

</body>

支持的类型
str, int, float, list(name.no), tuple, dict, set, object
循环
<h1>{{ question.question_text }}</h1>

<ul>

{% for choice in question.choice_set.all %}

    <li>{{ choice.choice_text }}</li>

{% endfor %}

</ul>
过滤器
- lower
- upper
- title
- capfirst
- length
- default
- slive(切片)
- cut(删去指定字符)
- floatformat
- random(随机获取列表中值)
- join(列表中拼接并展示)
- date(格式化日期'Y/m/d', 'Y-m-d')
- time(格式化时间'H:i:s'大H表示24H制)
- add(整数)
- first
- last
- safe(不对字符进行转移,比如
<h1>) - ...
{{ msg|lower }}

{{ msg|default:'msg' }}

{{ msg|floatformat:'2' }}
标签
不再自动转义
{% autoescape on %}

    {{ body }}

{% endautoescape %}
循环
{% for o in some_list %}

    <li>{{ forloop.revcounter0 }}{{ o }}</li>

{% empty %}

    <li>空!</li>

{% endfor %}
双层for循环
{% forloop.parentloop.counter %}
if
{% if %} 标签会判断给定的变量,当变量为True时(比如存在、非空、非布尔值False),就会输出块内的内容:
{% if athlete_list %}

    Number of athletes: {{ athlete_list|length }}

{% elif athlete_in_locker_room_list %}

    Athletes should be out of the locker room soon!

{% else %}

    No athletes.

{% endif %}


{% if athlete_list and coach_list %}

    Both athletes and coaches are available.

{% endif %}


{% if not athlete_list %}

    There are no athletes.

{% endif %}


{% if athlete_list or coach_list %}

    There are some athletes or some coaches.

{% endif %}


{% if not athlete_list or coach_list %}

    There are no athletes or there are some coaches.

{% endif %}


{% if athlete_list and not coach_list %}

    There are some athletes and absolutely no coaches.

{% endif %}
url
action中:

{% url 'user:login' %}


<form action="" method="post">

    {% csrf_token %}

    ....

</form>


views.py中:

def login(request):

    if request.method == 'POST':

        # TODO

    else:

        # 在模板中显示msg

        render(request, 'login.html', {'msg': 'error!'})

    return render(request, 'login.html')
CSRF(Cross-site request forgery)跨站请求伪造,是一种常见的网络攻击手段
当表单数据通过POST方法,发送到后台服务器的时候,除了正常的表单数据外,还会携带一个CSRF令牌随机字符串,用于进行csrf验证。
详见:https://docs.djangoproject.com/zh-hans/3.0/ref/templates/builtins/
模板继承
模板页面:

{% extends common.html %}


{% block title %}


子页面:

{% block title %}

body

{% endblock %}
static标签
static标签用于链接保存在 STATIC_ROOT中的静态文件。例如:
{% load static %}

<img src="{% static "images/hi.jpg" %}" alt="Hi!" />
还可以使用变量:
{% load static %}

<link rel="stylesheet" href="{% static user_stylesheet %}" type="text/css" media="screen" />
还可以像下面这么使用:
{% load static %}

{% static "images/hi.jpg" as myphoto %}

<img src="{{ myphoto }}"></img>
自定义标签和过滤器
详见:https://www.liujiangblog.com/course/django/150
模型
一个模型(model)就是一个单独的、确定的数据的信息源,包含了数据的字段和操作方法。通常,每个模型映射为一张数据库中的表。
- 每个模型在Django中的存在形式为一个Python类
- 每个模型都是django.db.models.Model的子类
- 模型的每个字段(属性)代表数据表的某一列
- Django将自动为你生成数据库访问API
from django.db import models


class User(models.Model):

    username = models.CharField(max_length=30, unique=True, error_messages='必须唯一!')
模型的元数据Meta
模型的元数据,指的是“除了字段外的所有内容”,例如排序方式、数据库表名、人类可读的单数或者复数名等等。所有的这些都是非必须的,甚至元数据本身对模型也是非必须的。
步骤
1 . 定义模型类
比如:
class User(models.Model):

    username = models.CharField(max_length=255, null=False)

    password = models.CharField(max_length=255, null=False)

    role = models.CharField(max_length=255, default='管理员')


    class Meta:

        db_table = 'user'
2 . 在 INSTALLED_APPS添加APP
比如:'dashboard.apps.DashboardConfig',
迁移和同步
# 同步

python manage.py makemigrations

# 在migrations文件夹产生一个文件

python manage.py migrate
执行后,数据库会自动新建表。
数据库的增删改查
查询指定关键字
        if request.method == 'POST':

            keyword = request.POST.get("keyword", None)

            result = ZhihuQue.objects.filter(title__contains=keyword)[:2000]

            return render(request, 'dashboard/search.html',

                          {'result': result, 'keyword': keyword, 'cnt': result.count()})

        else:

            return render(request, 'dashboard/search.html')
随机查询n条记录
        zhihuques = ZhihuQue.objects.order_by('?')[:100]

        return render(request, 'dashboard/zhihuque.html', {'zhihuques': zhihuques})
查询所有
        users = User.objects.all()

        return render(request, 'dashboard/users.html', {'users': users})
用户注册
        # 注册

        user = User()

        user.username = username

        user.password = hashlib.sha256(password.encode('utf-8')).hexdigest()

        user.save()
用户登录
        username = request.POST.get('username')

        password = request.POST.get('password')

        user = User.objects.filter(username=username).first()

        if user:

            if user.password == hashlib.sha256(password.encode('utf-8')).hexdigest():

                # 登陆成功

                request.session['username'] = user.username

                request.session['usersum'] = User.objects.count()

                return render(request, 'dashboard/dashboard.html')

            else:

                hashkey = CaptchaStore.generate_key()

                image_url = captcha_image_url(hashkey)

                captcha = {'hashkey': hashkey, 'image_url': image_url}

                return render(request, 'dashboard/login.html', {'msg': '用户名或密码错误!', "captcha": captcha})

        else:

            hashkey = CaptchaStore.generate_key()

            image_url = captcha_image_url(hashkey)

            captcha = {'hashkey': hashkey, 'image_url': image_url}

            return render(request, 'dashboard/login.html', {'msg': '用户名或密码错误!', "captcha": captcha})
修改
        user.password = hashlib.sha256(pwd.encode('utf-8')).hexdigest()

        user.save()

        return render(request, 'dashboard/edit.html', {'msg': '修改成功!', 'user': user})
删除
        user = User.objects.get(username=username)

        user.delete()

        # return redirect(users)

        return render(request, 'dashboard/users.html', {'msg': '删除成功!'})
使用Redis缓存
配置
在settings.py中插入:
CACHES = {

    "default": {

        'BACKEND': 'django_redis.cache.RedisCache',

        "LOCATION": "redis://ip:6379",

        "OPTIONS": {

            "CLIENT_CLASS": "django_redis.client.DefaultClient",

            "PASSWORD": "foobared"

        }

    }

}
使用
if cache.get('zhihuusers') is None:

    print('from db')

    zhihuusers = ZhihuUser.object.all()

    cache.set('zhihuusers', zhihuusers)

else:

    print('from cache')

return render(request, 'zhihuuser.html', {'zhihuusers': cache.get('zhihuusers')})
测试部署
只能测试使用,生产环境部署需要NGINX和uWSGI
nohup python3 manage.py runserver 0:80 &
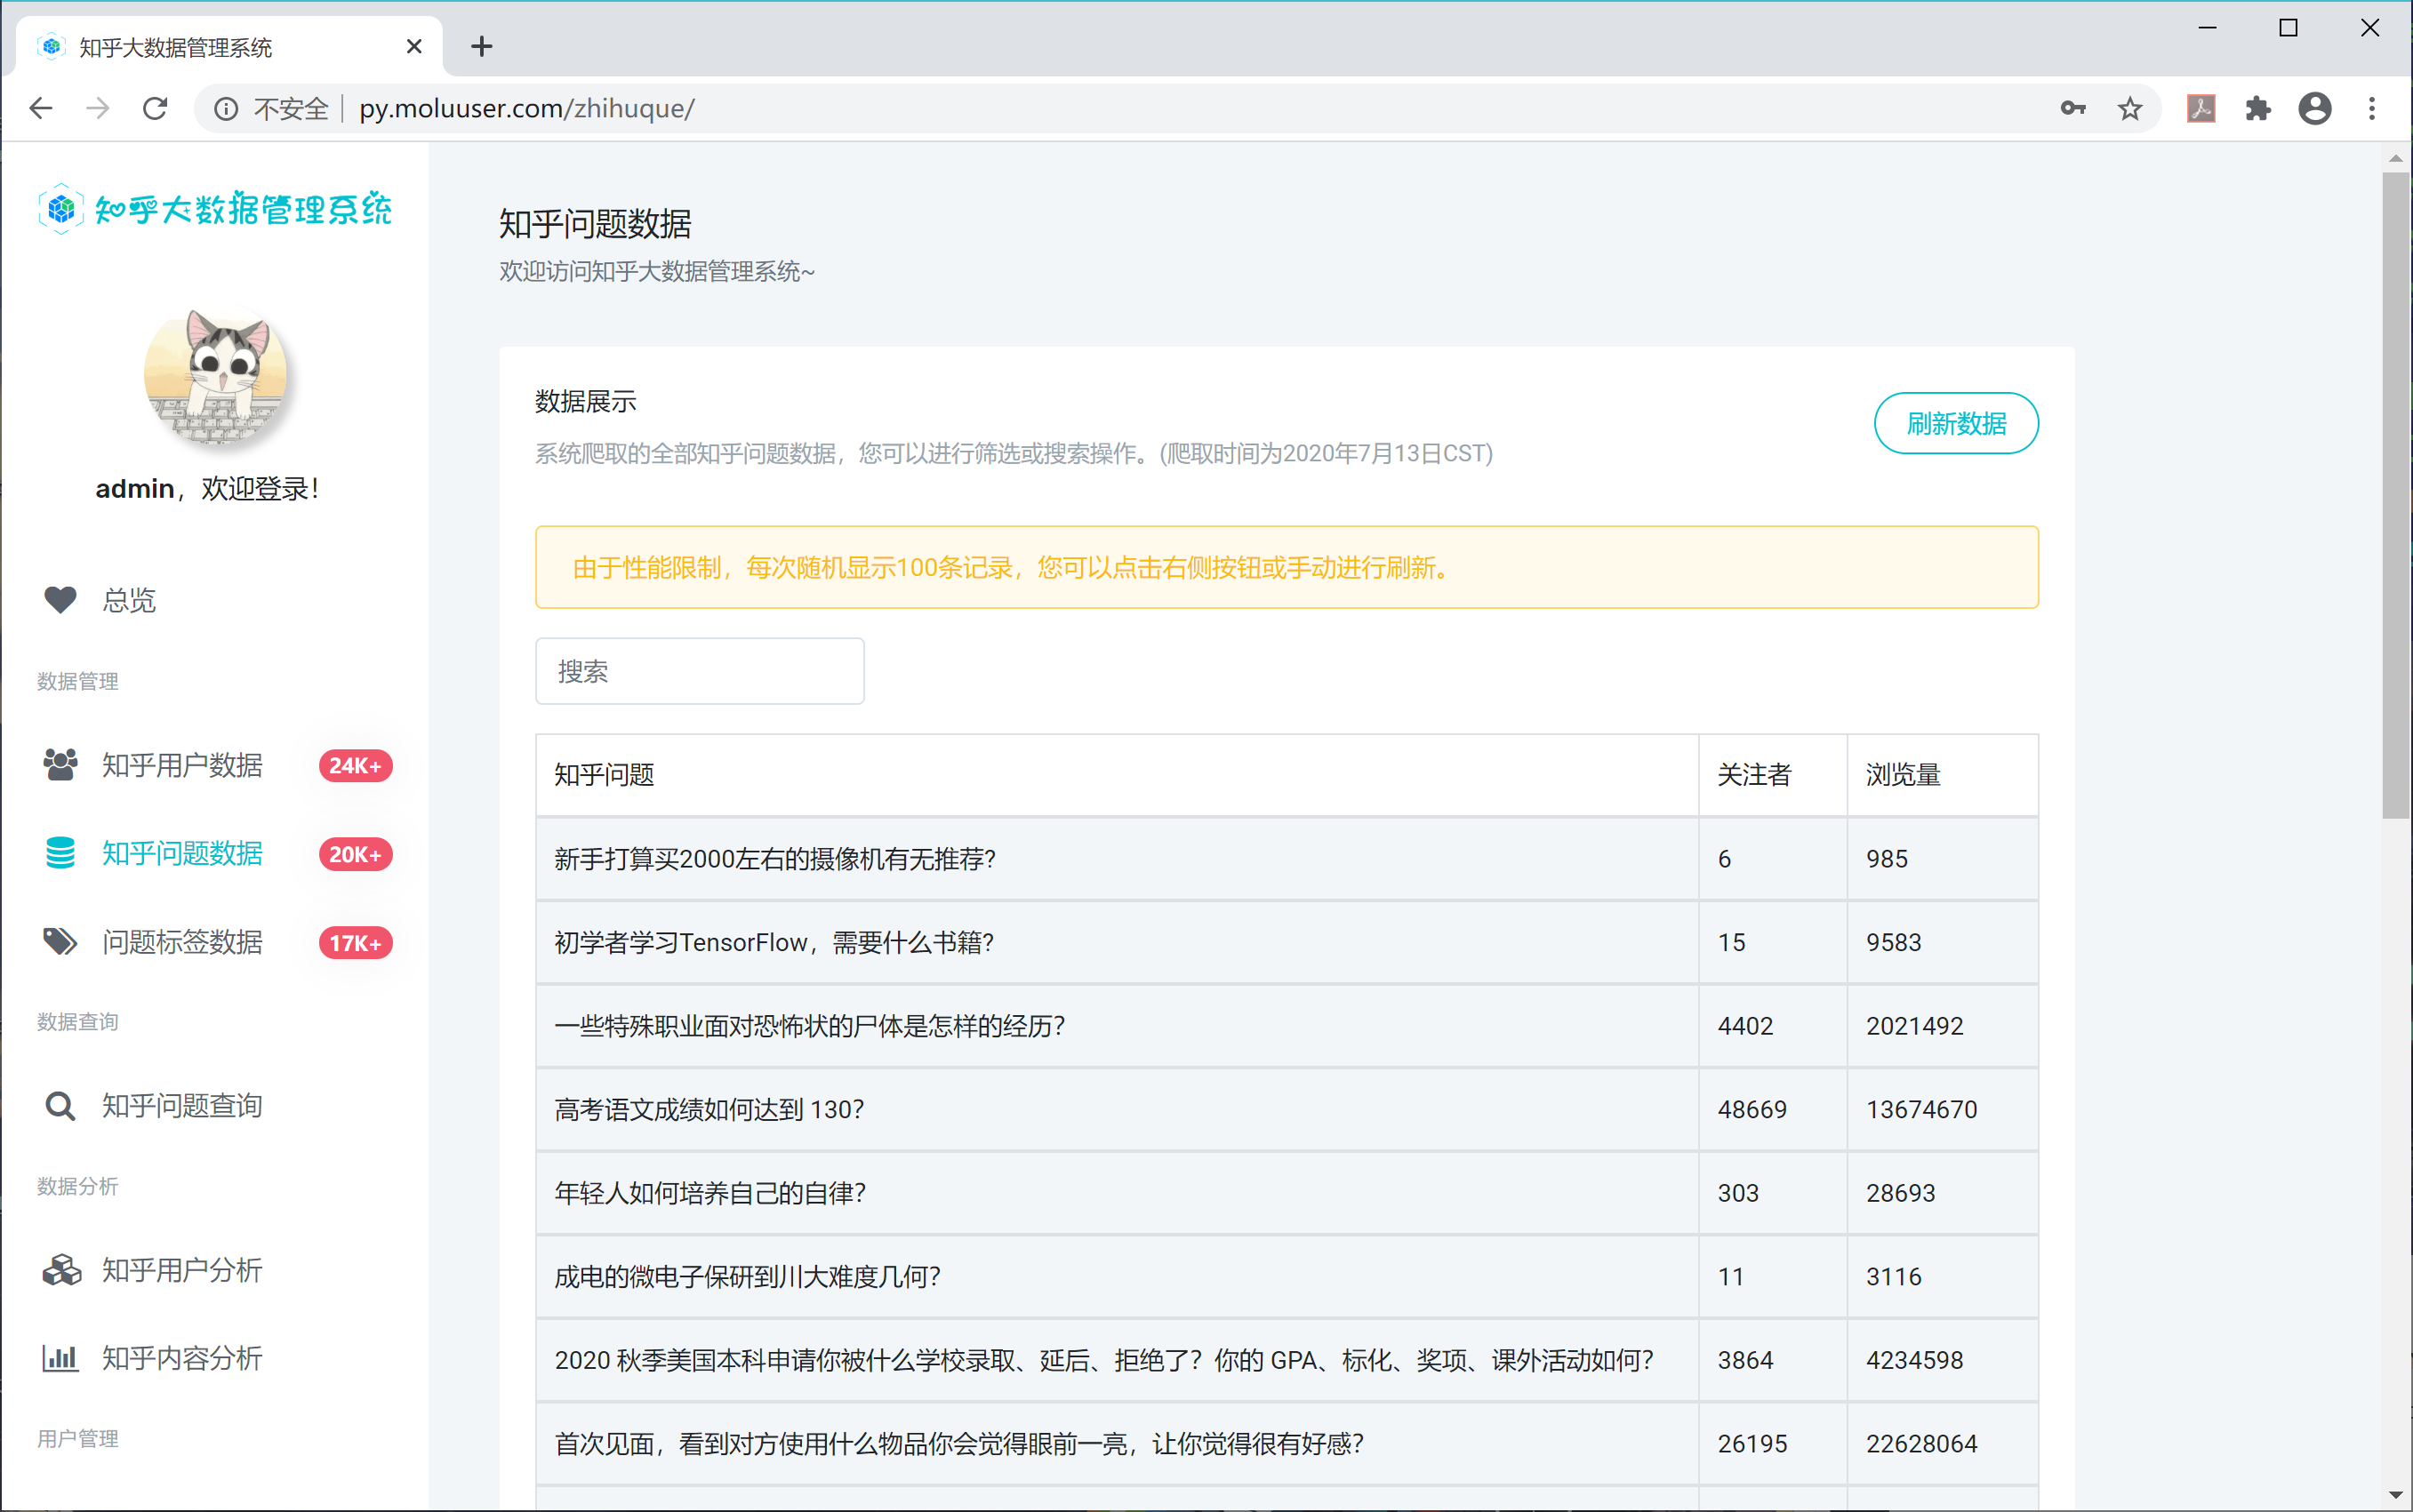
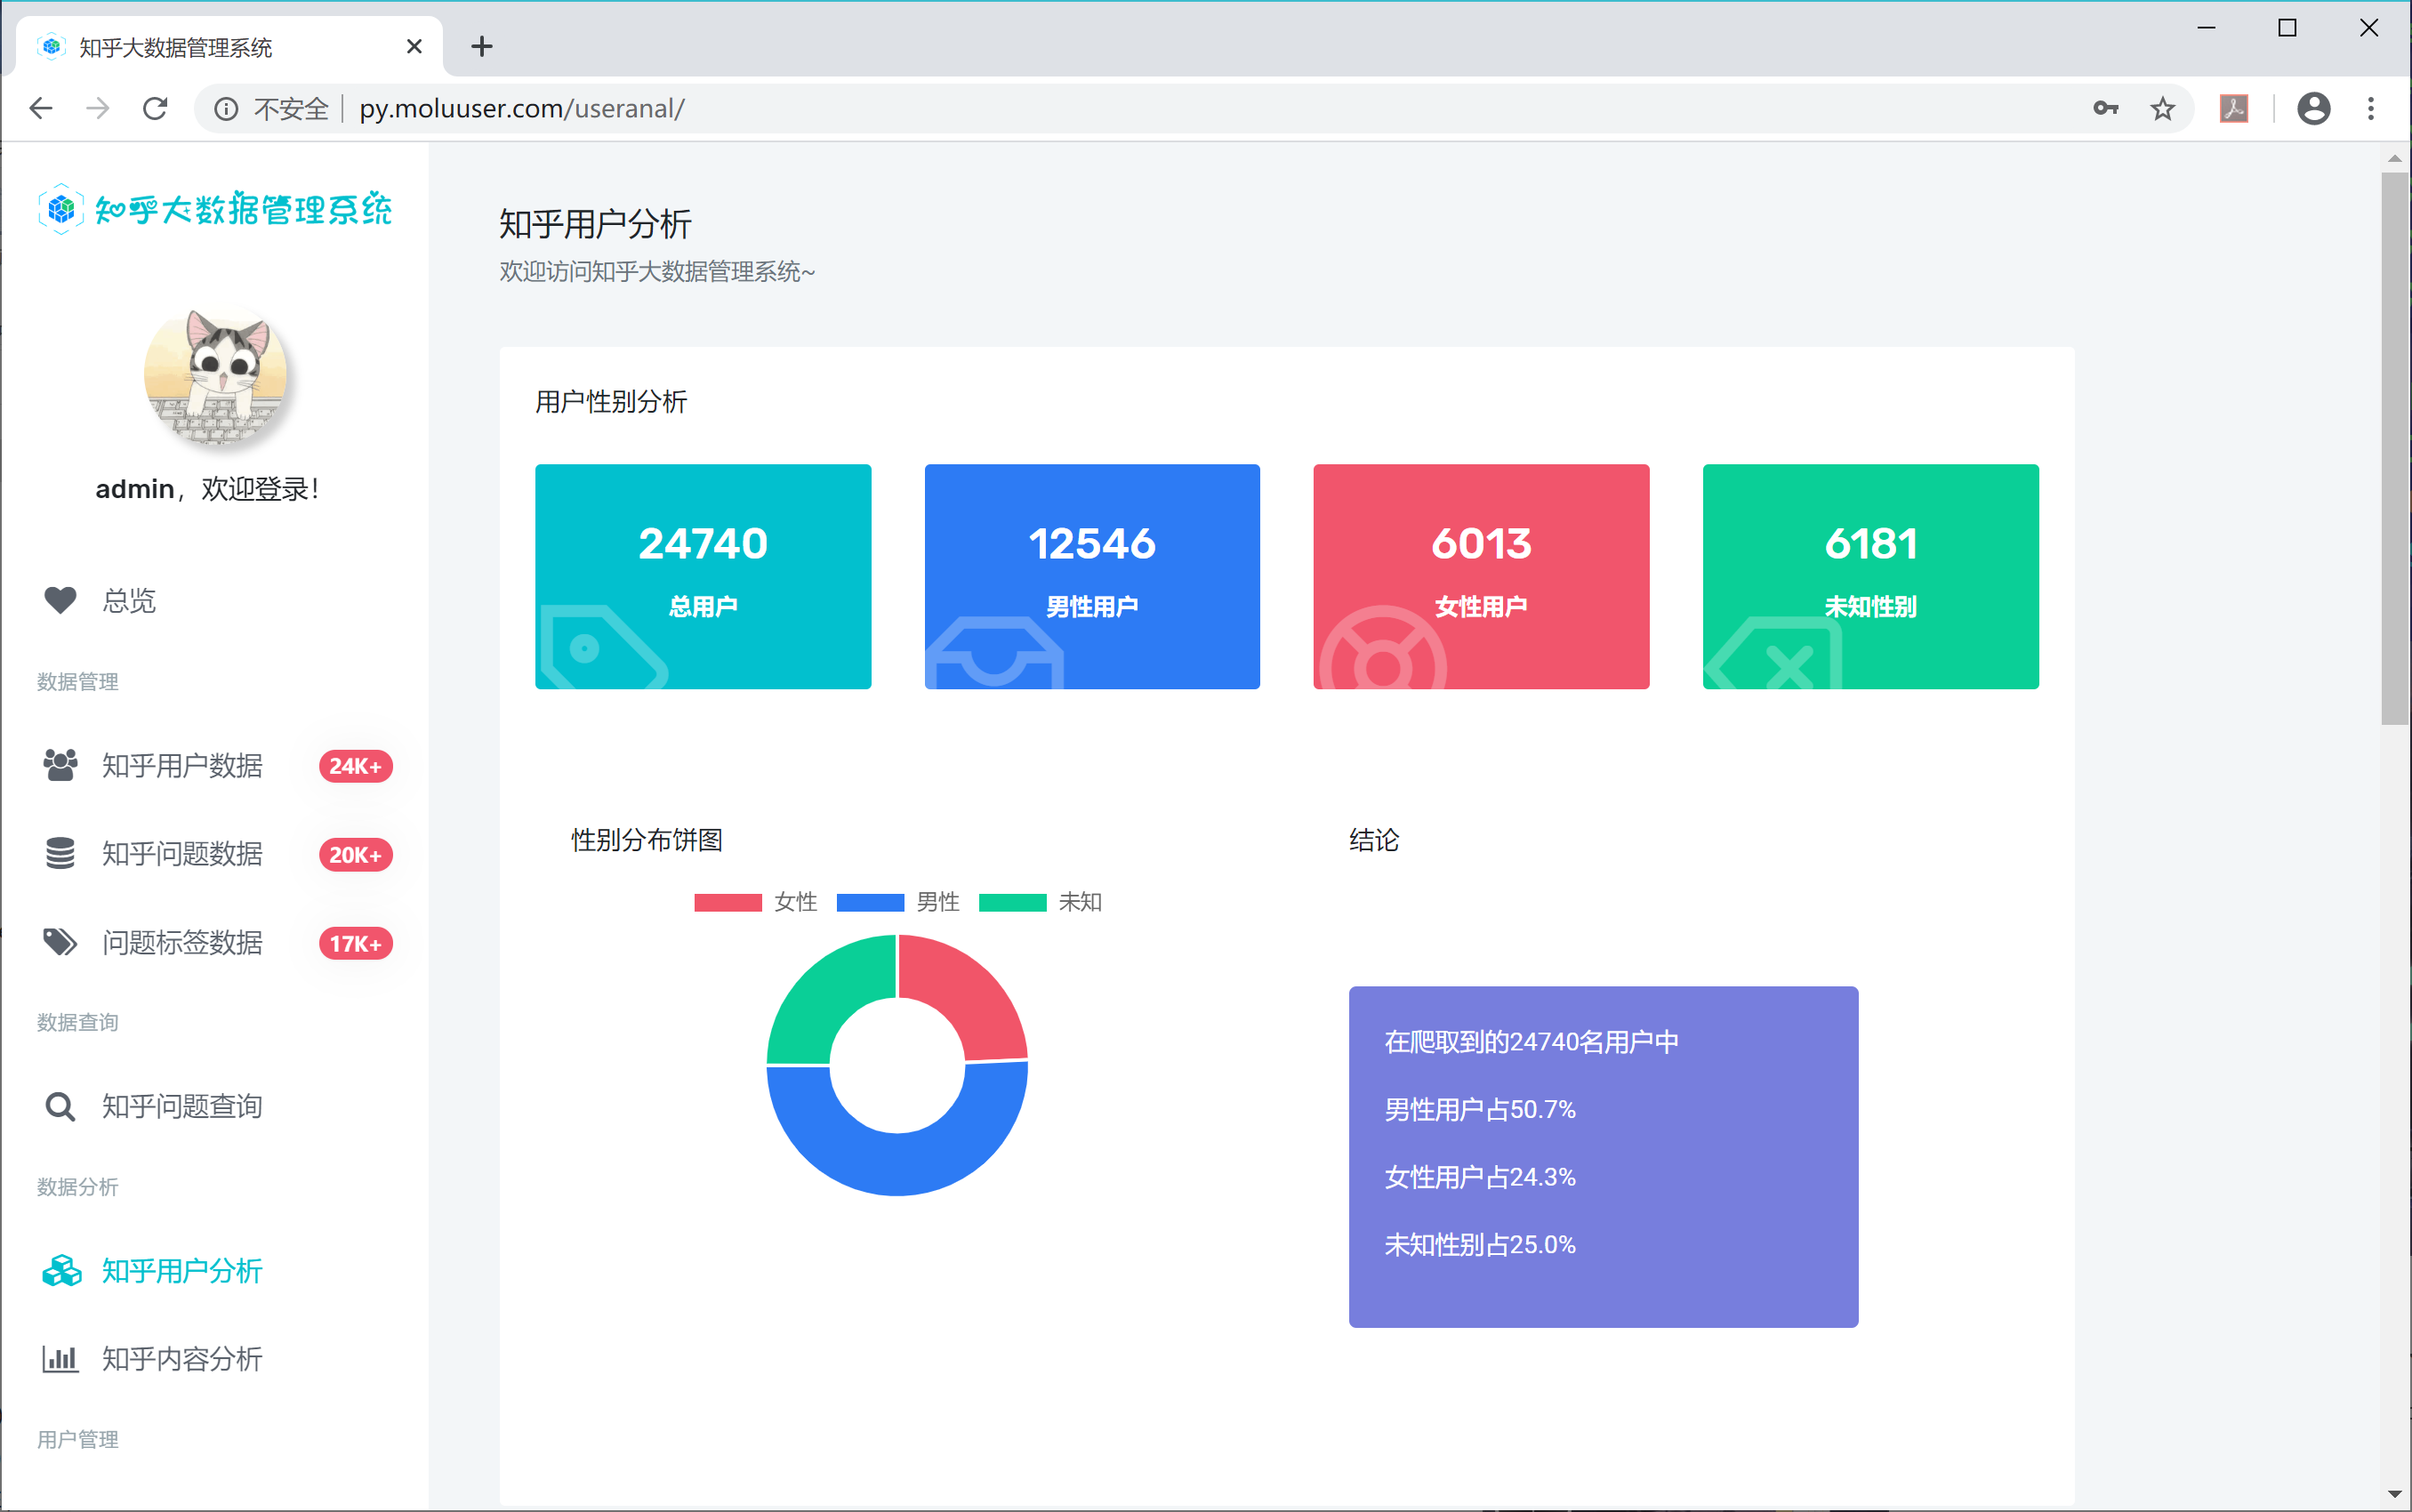
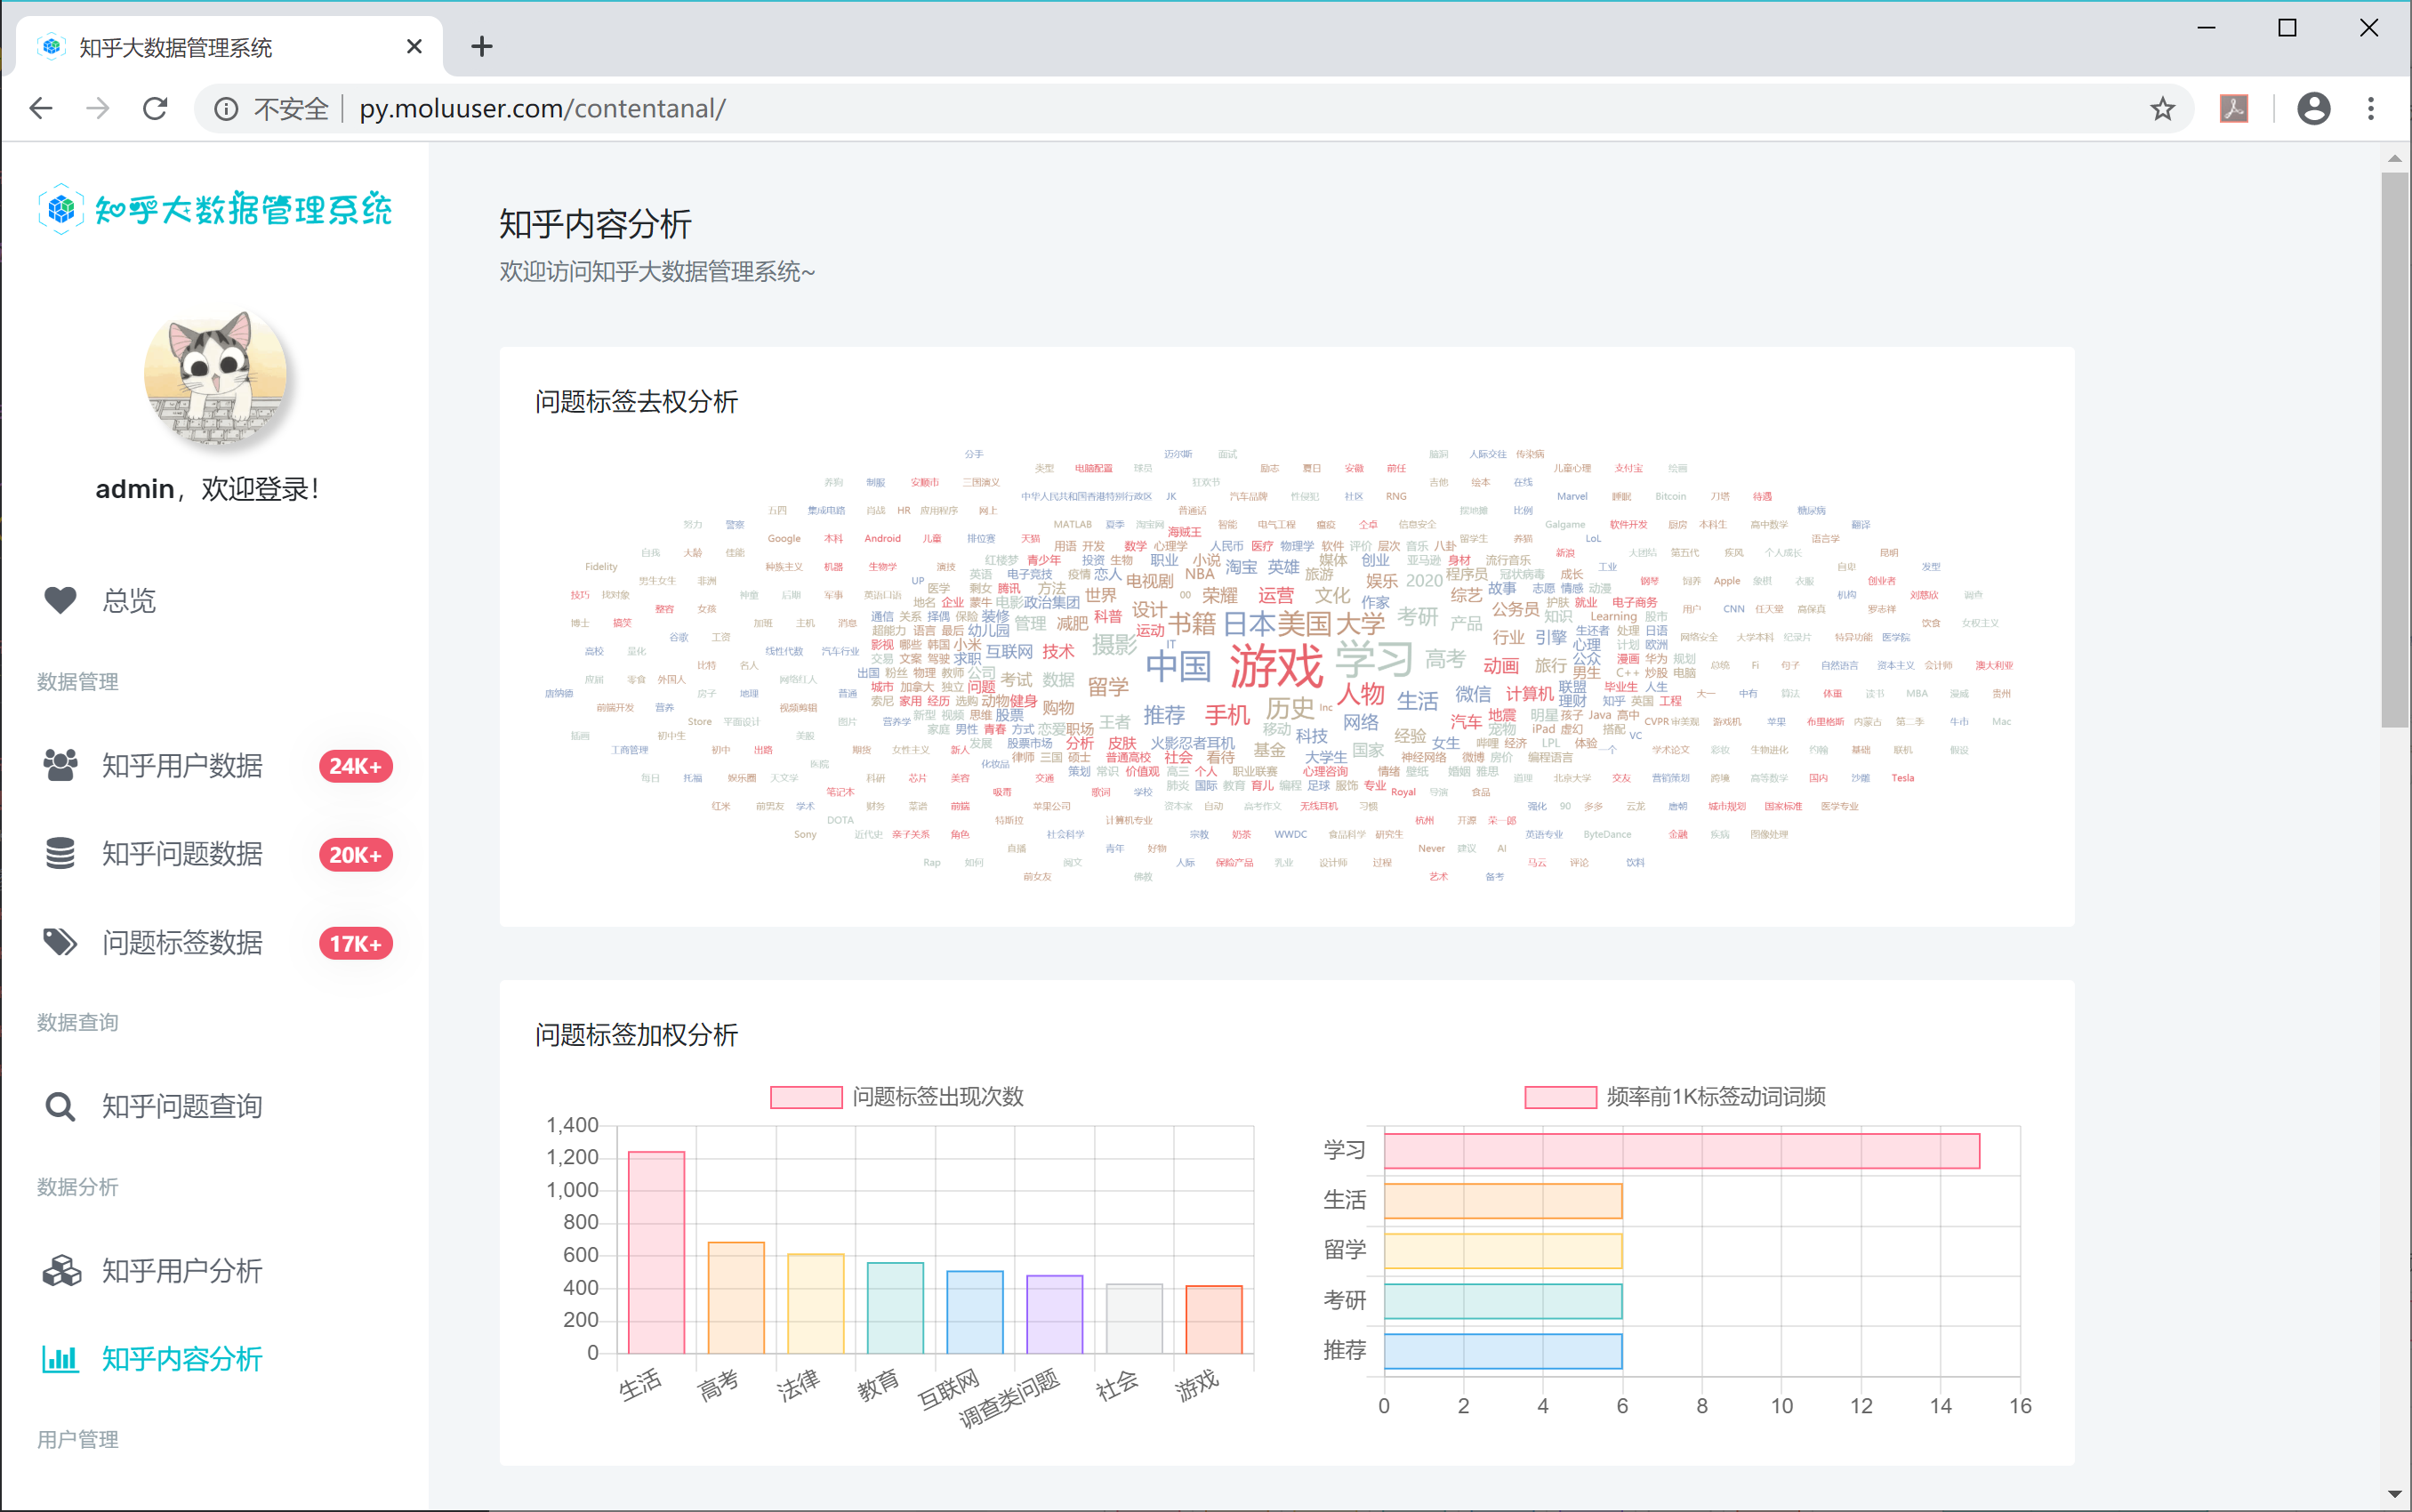
记录下学习Django做的Web
大致实现了用户注册登录,验证码,数据库数据的分页显示。

参考链接:
- https://www.liujiangblog.com/course/django
- https://www.mf8.biz/rhel8-centos8-install-mysql-8-0/
- https://www.myfreax.com/how-to-install-mysql-on-centos-8/
- https://blog.csdn.net/qq_26563299/article/details/80396310
- https://www.howtoforge.com/how-to-install-django-on-centos-8/
版权属于:moluuser
本文链接:https://archive.moluuser.com/archives/62/
本作品采用知识共享署名-非商业性使用-相同方式共享 4.0 国际许可协议进行许可。


案例丰富,数据详实,论证扎实可信。